- Read Tutorial
- Watch Guide Video
In any older version of rails, you would use a tool such as .m or Figaro, in order to protect your credentials so that no other users could see them, but you could still use them in your application.
This would be anything from say AWS credentials for connecting to Amazon Web Services, to your secret_key base, to Twitter or anything like that. Now in versions 5.2 and above, you can actually store those inside of the application, and access them which is really nice and handy.
In this guide, I'm going to walk through how you are able to do that. So I'm going to build out very quickly here in New applications. I'm going to say: rails new CredentialsApp -T --database=postgresq.
I'm going to have it pass the tests. Then I'm also going to use the postgresq database. The reason for that is because there is a little trick that you need to do in order to get this working on Heroku, and I want to show that to you as well here.
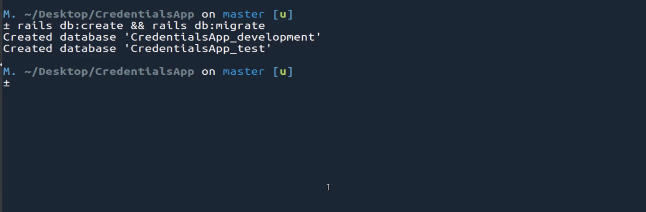
I'm now going to change into this application cd CredientialsApp, and now I'm going to quickly create the database and migrate it so I can say rails db:creates && rails db:migrate. That's just going to create the database, and then create a schema file for us. So all of that is done now.
If I open up the application and I'm using vim here, but it's perfectly fine for you to use Sublime Text or anything like that. I'm going to first show you in the file system how it's different. In years past, what you would do is you'd have the config directory here and then inside of here you'd have the secrets.

Now you may notice we don't have a secrets file anymore. Now we have a couple different files. We have this credentials.yml.enc. Now if I click this you're going to see that I have all these weird characters here. That is because this file is encrypted by default, so you do not just simply open up the file directly and edit its contents.

That is something that is very important to know. Then coming down a few more lines here. You can see we now have this master.key. Now this master.key is the key that will unlock your credentials.yml.enc, so this is the key they'll decrypt this file.
It is absolutely critical that you do not give this to anyone except someone on your team, so you do not push this up to github or anything like that. One of the nice things in Rails versions 5.2 and above. They wanted to make sure that would never be an issue.
So if you come down to that get ignore file down here you can see that by default. This has already been added for you. So here on lines 26, you can see it says ignore master key for decrypting credentials and more. It's passed in. So you don't even have to do anything with it.

Just make sure to never comment out or remove this line, because if you push up this master.key what that means is that anyone who has this key can unlock and decrypt this secured credentials file. Let's close this out, and let's take a look at how we can actually work with the file.
The way you can do that is by typing rails credentials:edit. What this is going to do is it's going to open up in your editor of choice, so whatever your default editor is, mine on the system is vim. If I click this it's going to allow me to edit the file.
You also can, if you have some other editor, you can define it here so you could do something like EDITOR= and then whatever command it is. You may have say sublime or whatever it is. For me, I'm just gonna go with my default one, so I'm going to say rails credentials: edit and then hit enter. What this is going to do is it's going to decrypt that file.
Now it needs a master key in order to do that. It's decrypted, and now that file that you saw before that had all of those weird characters. This is what it looks like when it's decrypted. Which is pretty cool so you can see that we have the secret_key_base this is generated automatically and then you have comments.

This kind of gives you a nice set of examples for how you can work with this. First, let's just comment these out, so I'm going to come here and say we have aws. We have an access_key_id, and then we have the secret_access_key.
Now you can also nest these even further, so if you say you wanted to have a set of development and production keys, so say that you want to work with aws, and you want to work with a bucket that only stores your local development files. Then you can create a development.
You can create this little parent here, and you need to indent this. Now, you're going have development:, aws, and then you'll have keys for development. I can copy this, and then I can create some production lines.
I can say production:, and let's say in this one the access key is going to be abc and the secret_access_key is going to be xyz. This is how you can use nested keys, and that's one way of doing it.

Now, if you do not have to do that it's actually a lot more straightforward to simply place these all on one line. That's called a flat syntax. If I want to have, say some_special_variable. Obviously, you can call this whatever you want, then give a colon, and then whatever the value. Here I can say secretsstuff.
In a real-life application, this could be something like say your Twitter secret code, and then you have access to grab this value but no one else is able to do it. Because this is encrypted you can push this up to github, and no one's going to be able to see any of this code here.

Let's save all of this here. I'm going to open up Tmux, just so you're able to actually see all of this side-by-side, which is a reason why I'm actually using this setup in the first place. So I'm going to say config/. Actually, let me open it up so we can see this, so rails credentials: edit once again.
Then right below here, I'm going to open up a new pane, and I'm gonna open the rails console. What I'm going to be doing here is I'm going to run code that you could run anywhere in your application. I'm running it in the console to show you that I have it available.
You could place this in a controller or anything like that. So any place where you need to access one of these items then you can use it with these commands. So let's do the easy one first, I'm gonna grab that some_special_variable. So I'll say: Rails.application.credentials.some_special_variable.
Note that right here, this call is mapped directly here. So you're calling rails or you are saying I want you to load up the ecosystem of rails. I want you to call the application, which is our application, then I want you to look for the credentials. Then it's going to come in this file.

Then it's going to decrypt the file and then it's going to look for something called some_special_variable because we named it right there. Now, if I run this, you can see it returns secretstuff. If this was our Twitter API key, then it would return that.
That's all you need to do when you're working with the flat syntax where you only have a single line. Now, if you want to grab the nested ones, so say we want to grab the production access key ID, well what we have to do is we have to traverse this tree in order to grab that value.
So instead of saying Rails.application.credentials.some_special_key, we first have to say production, because that is at the top of this tree. Then we can use the rails hash traversal syntax. I know, a few big words. All it means is I want to be able to pass in this chain of names in order to find the element I'm looking for.
So here I can say production[: because I'm passing this in as a symbol, aws end the brackets. Start a new set of brackets, and then say production[:aws][access_key_id]. Run that, and now you can see if I run that, it returns abc. Just like we have right here.

Now if I run this again, but now I want the development one. You can see it returns 1 2 3. That's how you can access a nested set of values.

Now if you try to access something that doesn't exist. Let's try this. I'm gonna say credentials but it's something that doesn't exist like oops I run this. It returns nil.

That's very important to know here, is that if you are trying to call a key one of the most common issues that I've seen individuals run into is where they call something, and maybe they have a typo or they typed it in the wrong case, something like that, then that is going to be the result. You're going to get nil, which is very important to know.
That is all you need to know there. Now I also want to, let me close this out, say that for some reason you need to reset your secret_key right here. By default when you generated the application, you have the secret_key, but if you need to generate a new one, the syntax for that is to say rails secret.
Just like that, and then it's going to go and it's going to create a new secret_key for use. You can see it's right here, and you can see this is different than one that you have in this part of the application. Now this will not go and replace it, so this has not changed the file whatsoever.

What you can do is you can simply copy this and then replace it inside of that file. That is just something in case you ever need to replace that secret_key. That's really all that you have to do in order to get this working.
Now let's build a quick little feature because, as helpful as all this is, one thing that I have noticed is this takes you all the way up to where you can build all of these features in your local environment. If you go and try to push this up to Heroku, you're going to run into a bug.
I'm going to very quickly create a feature here, and then we're going to push all this up to Heroku. So I'm going to say rails g scaffold Guide title:string. This is just going to build a dead, simple, little feature here. I'm going to say rails db:migrate, and then that is going to migrate it.
Now let's also open up the routes file, so vim config routes. Here I want to go and I want to make a home page. There's no reason to do this except so that we can see it actually working on Heroku. So I'm going to say route to, and then we'll say 'guides#index', just like this. Hit save.

Now, I start up the rails server with rails s. I also have to, because of my setup, you may or may not have to do this as well, add a -p Flag to declare the port. This is going to allow me to open it up at localhost 3001.
If I go the browser here, go to localhost 3001, I can click new guide, and just type anything in. It saves, and so everything here is working. This is more just kind of a smell test to make sure that there are no issues, syntax errors, or anything like that.

Now that we have that, we can create a whole Heroku app just based off of this. Now if you're following along and you've never worked with Heroku Roku or anything like that, that's perfectly fine. You do not have to follow along right now. I'm simply going to do this, and then, later on, you can use it as a reference.
The main reason is because when I was personally deploying my very first ever rails 5.2 app, I ran into this bug. I wanted to include it in this guide. I can first make sure that we have a git repository. So I can say git status. Yes, we do, so I'll say git add all, and then git commit -m "initial commit".
Then we're not going to push this up to github. There's not really a reason for it. There's no code because everything's encrypted that you can even reference. So there's not really a point in doing it. It's just pretty much an empty app, so I'm going to push this code directly to Heroku.
I'm going to start off by creating the Heroku application by saying heroku create devcamp-credential-demo. Then this is going to go and create that application. Now I can say git push heroku master. Now this is going to take a little while, and I'm just going to fast forward the video right here and we'll come back when it's all pushed up.
Okay, that got pushed up. I can say heroku run rake db:migrate. This is going to migrate the database, and it's telling me "my free app running time quota is exhausted".

What this means if you get this error, if you're like me and you have a ton of applications on heroku, then you only are given a certain amount of free time, and any new app that you push up is automatically going to be considered a free application. Let's go and fix that.
That's the reason why I had Heroku open right here. I can search for that credentials application. Let's hit refresh, and access it. What I do is I'm just going to temporarily mark it as a paid application. Say devcamp-credentials-demo.
If you ever need to do this, there's a couple of ways. One, you can go to the Dyno formation right here. You can configure Dynos, and change it to a hobby level, which I believe is seven dollars a month, or I'm going to move this into the Bottega group plan.
I can come here and simply change this to Bottega. Click transfer application, and this will do this automatically for me. Now, this is automatically in the Bottega plan, and now it will actually be working. If I come up to open app right here, you'll see that we can see our live application, I can click on new guide and add a guide.

Everything's working, but you may remember that a little while ago I said that this would not be working. Well, I was not lying, it's a little bit of a subtle bug, and it's part of the reason why I wanted to include it. That is because by default this is not going to be able to read from our configuration variables from our encrypted credentials.
What we need to do is inside of the Heroku application, if you click on reveal config bars. We're going to have to add a new key here. This key is going to be the master key from our application.
So I'm going to come here, and I'm just going to close out of all of this. The way that you can copy this, you can go back in your text editor, or you can just say cat config/master.key. It's going to return that. I'm going to copy it, and then if you come back here in the value you are going to paste this.
Let's verify that that works, so that's 96D is what starts with and ends in 448. It looks like it copied also the little percent sign. You don't want that. Now right here you may wonder what you put as a key. Well that's where it's a little bit tricky.
Heroku has it set up so that if you type in RAILS_MASTER_KEY, and then click on Add. Now you're going to have access to that. You need to make sure that you put in that syntax. You can say heroku restart because anytime you make a change to your configuration variables, then you might need to make sure that you are actually updating and restarting the application.
If I come here, click on back, hit refresh. We don't have any errors, so that's a good sign. Now let's test to see if we actually have access to one of those values. Let's open up the code here, and I'm going to show you a few ways that you can grab this.
I'm going to go into app, we have this guides_controller in the index. I think it makes sense to run the query here, so I'm just going to say...let's see what we called this. I'm going to say, I'm pretty sure it was that production aws key. So I can say @aws_key = Rails.application.credentials.production[:aws][:].

Obviously, usually, you're not going to be rendering this out. This is more just to show you how to do it. I have forgotten the exact name that I want here, so let's just close this off. I'm going to save it, and then let's take let's take a quick look at it. In fact, let me say rails credentials:edit.
I named this access_key_id, so that should return ABC. Now let's just type that in, @aws_key = Rails.application.credentials.production[:aws][:access_key_id], and then I want to render this into the view. Right now I'm in the controller, and I'm going to open up the guide index, so that has access to it.
Then just right below the title here, and add a <h2>, then we can access this. We can use our ERB, and then we'll just say <%= @aws key %>. Now we should actually have access to that. Let's also close off h2.

Everything here should work if we have everything wired up. I'm going to test this locally, then we can push this up to production, and test it on Heroku. So let's say rails s dash -p 3001. We don't have any bugs there, so that's a good first sign. Go to local host 3001, and there you go.
You can see it says ABC. That is the correct way to look it up. Now let's push this up to Heroku and say git add ., git commit -m "updated and called keys". Now we can say git push heroku master. That's all been pushed up and deployed. Now let's come and take a look at our production.
If we come here, and hit refresh you can see we have ABC. Now if you do not add that in, so if I come here and let me copy this RAILS_MASTER_KEY, delete this configuration variable, come back and restart the system with heroku restart. If you come back into your app and hit refresh, you're going to see it runs into an error.

I can tell you from experience that's not a fun one to debug, because the first time ever pushed up a 5.2 application to heroku and got that error, the air was really not descriptive whatsoever. That's a reason why I wanted to include it.
Now, even if you never deployed to Heroku, you're at a point in your rails development or in a course where you simply are building out the application, then just going to put this in your back pocket. That way, you know in the future if you deploy an application to Heroku you do need that master key.
Let me paste this inside. Once again, the syntax is all this in caps, so this is RAILS_MASTER_KEY just like this, hit Add, and restart the server. Now you're going to have access to this.
We have access to all of those configuration variables, and they're all going to be encrypted for you. In summary this is how you can work with the new version of encrypted credentials inside the Ruby on Rails framework.