- Read Tutorial
- Watch Guide Video
In this lesson, we are going to configure our Carrierwave photo uploader. This will allow our application to know: where file uploads should be directed, how to manage dynamic sizing of photos, and a number of other upload configuration options.
I'm going to just copy-paste the code, and you can do so too from the github library where you'll have access to this code. Since this file has about 64 lines of code, I wouldn't suggest you type it all out. However, we'll walk through each line.
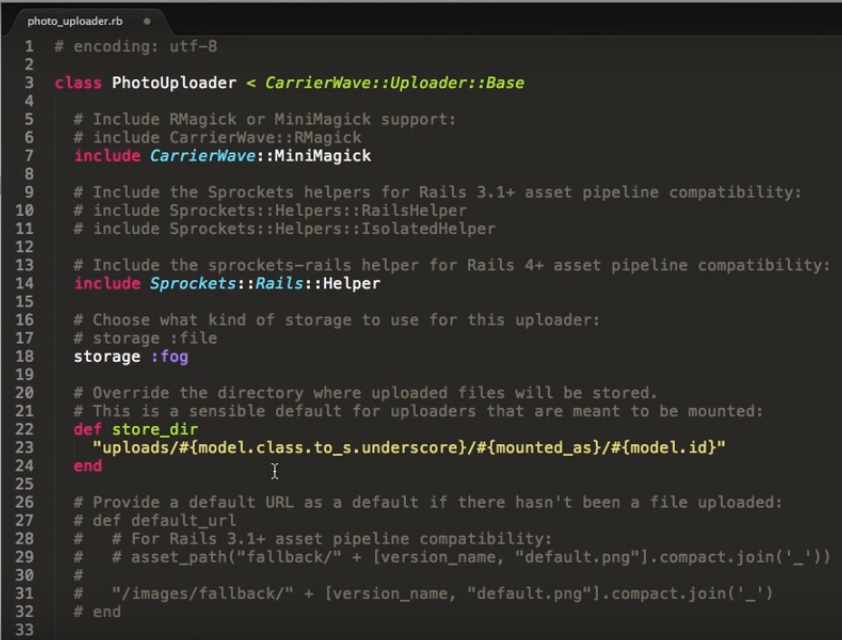
The first thing we are doing is to bring the MiniMagick extension of CarrierWave, which allows us to resize images or reduce their file size, along with a number of other options.
The second line adds the sprockets to give asset pipeline compatibility to Rails. It's not something that we're going to use, so we don't have to worry about it much. It just makes certain methods available to the class.
Next, the storage variable is set to fog. If you remember in the last lesson, our storage was set to file. This is changed now because fog is what gives us connectivity to the AWS.
Next, the store_dir method sets the name and path for our files. These parameters ensure that no two files have the same name.
Next, I've integrated two cool actions from MiniMagick.
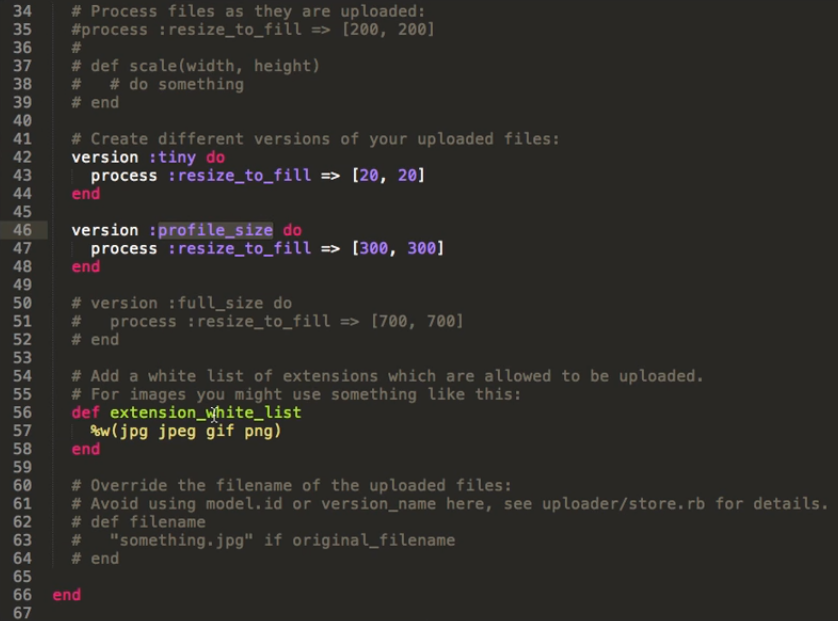
Both these pieces of code resize the file size for us. The first one tiny creates a thumbnail size of 20x20 pixels while the second one, profile_size, creates a larger image for us at 300x300 pixels. To do both these actions, we are using a built-in method called resize_to_fill.
Lastly, we are listing out the formats that will be accepted by the application because we don't want people to upload anything and call it an image. So, our application will allow only files with the extensions jpg, jpeg, gif and png. In a way, this validates the files that will be uploaded. If you've never seen this syntax %w, it's just a way of creating an array.
To explain this syntax, let's go to our irb console. Here, I'm creating an array the normal way and an array using %w.
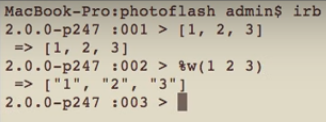
The only difference is that if you use %w, it renders every value in the array as a string.
So, that how you build your uploader code.