- Read Tutorial
- Watch Guide Video
We're starting to get into some really cool things when it comes to VIM and we're taking advantage of some neat plugins, and in this one, I want to show you how we can integrate what's called the Nerdtree-git plugin, or VIM plug in. And this is not the plugin we're actually going to integrate because this one is deprecated. I'm gonna show you the one we're actually gonna use, but this gives you a really cool visual.
So if you're used to having Sublime or some kind of text editor that has a file system on the right hand side where you can navigate to items, then you may kinda of be missing that in VIM, especially when you're working on a rails application, so I want to show you how we can integrate that. To do that, we're actually gonna use this version of nerdtree, and it's called a tree explorer plugin for VIM and I'm gonna show you how to integrate it, but I'm also gonna show you a little trick that I had to do in order to get this working.
So the first thing in order to get this working is we're gonna use the pathogen version of this. So come into the terminal and paste this command in, I already have this installed, so if I try to run this, it's going to give me an error. However, let's look at the path.
git clone https://github.com/scrooloose/nerdtree.git ~/.vim/bundle/nerdtree
So first, we're saying get clone and then it's just the regular git URL string and then we're saying go into the VIM directory which if you remember, that's where we have integrated plugins before, like the control P plugin and then inside of bundle, we're gonna put nerdtree, and so just run that to install it, but I'll show you that I already have it.
So if I run tree, and then go into VIM bundle, you can see right here that I already have this installed, let's see where I have this one. I have, as you can see, quite a few things on my system already installed. It's actually gonna be easier just to type in 'ls', so 'ls' right here and this will show you what I have installed in bundle, there you go, so you can see I already have nerdtree.
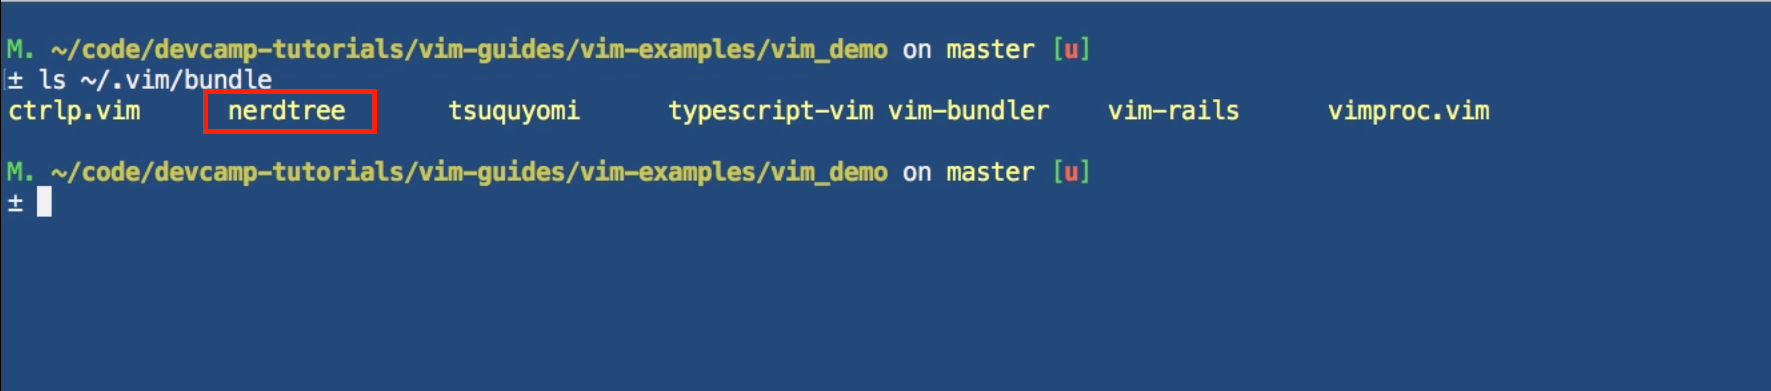
So if you can run this command right here afterwards, and you have nerdtree, this means that you should be good to go.
ls ~/.vim/bundle
Now let's add in to our VIM RC file, the key bindings. So I'm gonna come here and let's paste in the key bindings they say, if you want to have nerdtree automatically start up when VIM starts up, if no files were specified, and this is the one I like.
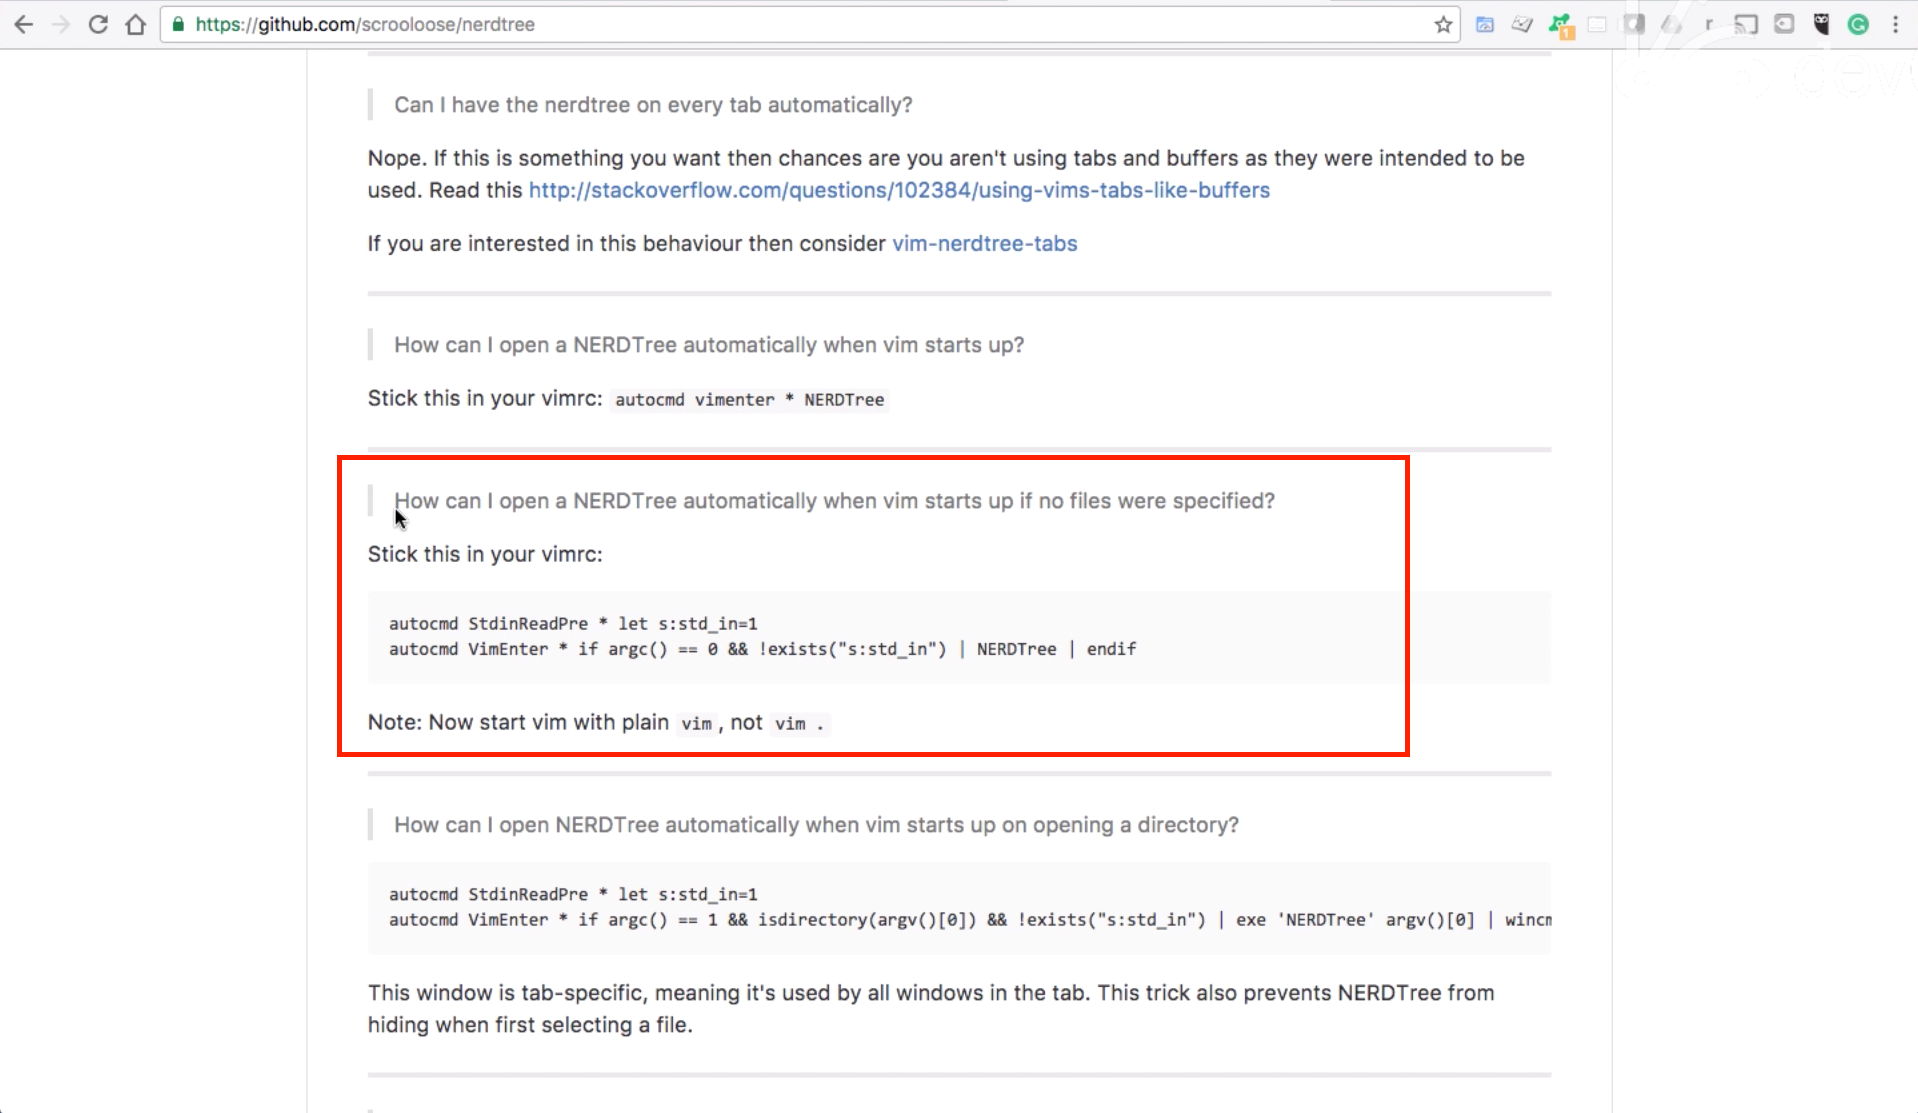
So you have a few different options, you can play around with these. I don't like all of them because I like having some kind of customization. If you start with this version, as you can see, it says, "How can I open nerdtree automatically when VIM starts up "on opening a directory?", that isn't always what I want.
There's many times where I want to start a file without having the tree on the left hand side. So this is going to give me the ability to simply go to whatever directory I want, just type in 'VIM', and then it will open that up for me.
So now I'm gonna hit paste, if I just did this by itself, this is not going to work. And the reason for it, and I'm gonna show you why it's not, let's quit out of this because this is something I think that's important to see the error message because you may run against this at some point.
So if I type in VIM from here, you can see it says, "Error detected while processing, VIM enter auto commands for star".

And what this means is that it couldn't find that file. So let's come here and if you saw what we did for the runtime path for ctrl + P, that's all we have to do here. So, I'm going to copy that but instead of ctrl + P, here I'm going to... and I don't want that, I wanna just delete it. Here I want to just type in nerdtree and this is the path if you can see we're at the .VIM directory in the bundle directory, and we want nerdtree so we can have this runtime path set.
If I hit quit now, you can see if I type in "ls" you can see that I have my full rails application.

Now if I just type in "VIM", I won't type a period, I won't type anything, I won't type a file name. If I just type in "VIM", you can see now we have what's called the "nerdtree" or the file system right here.
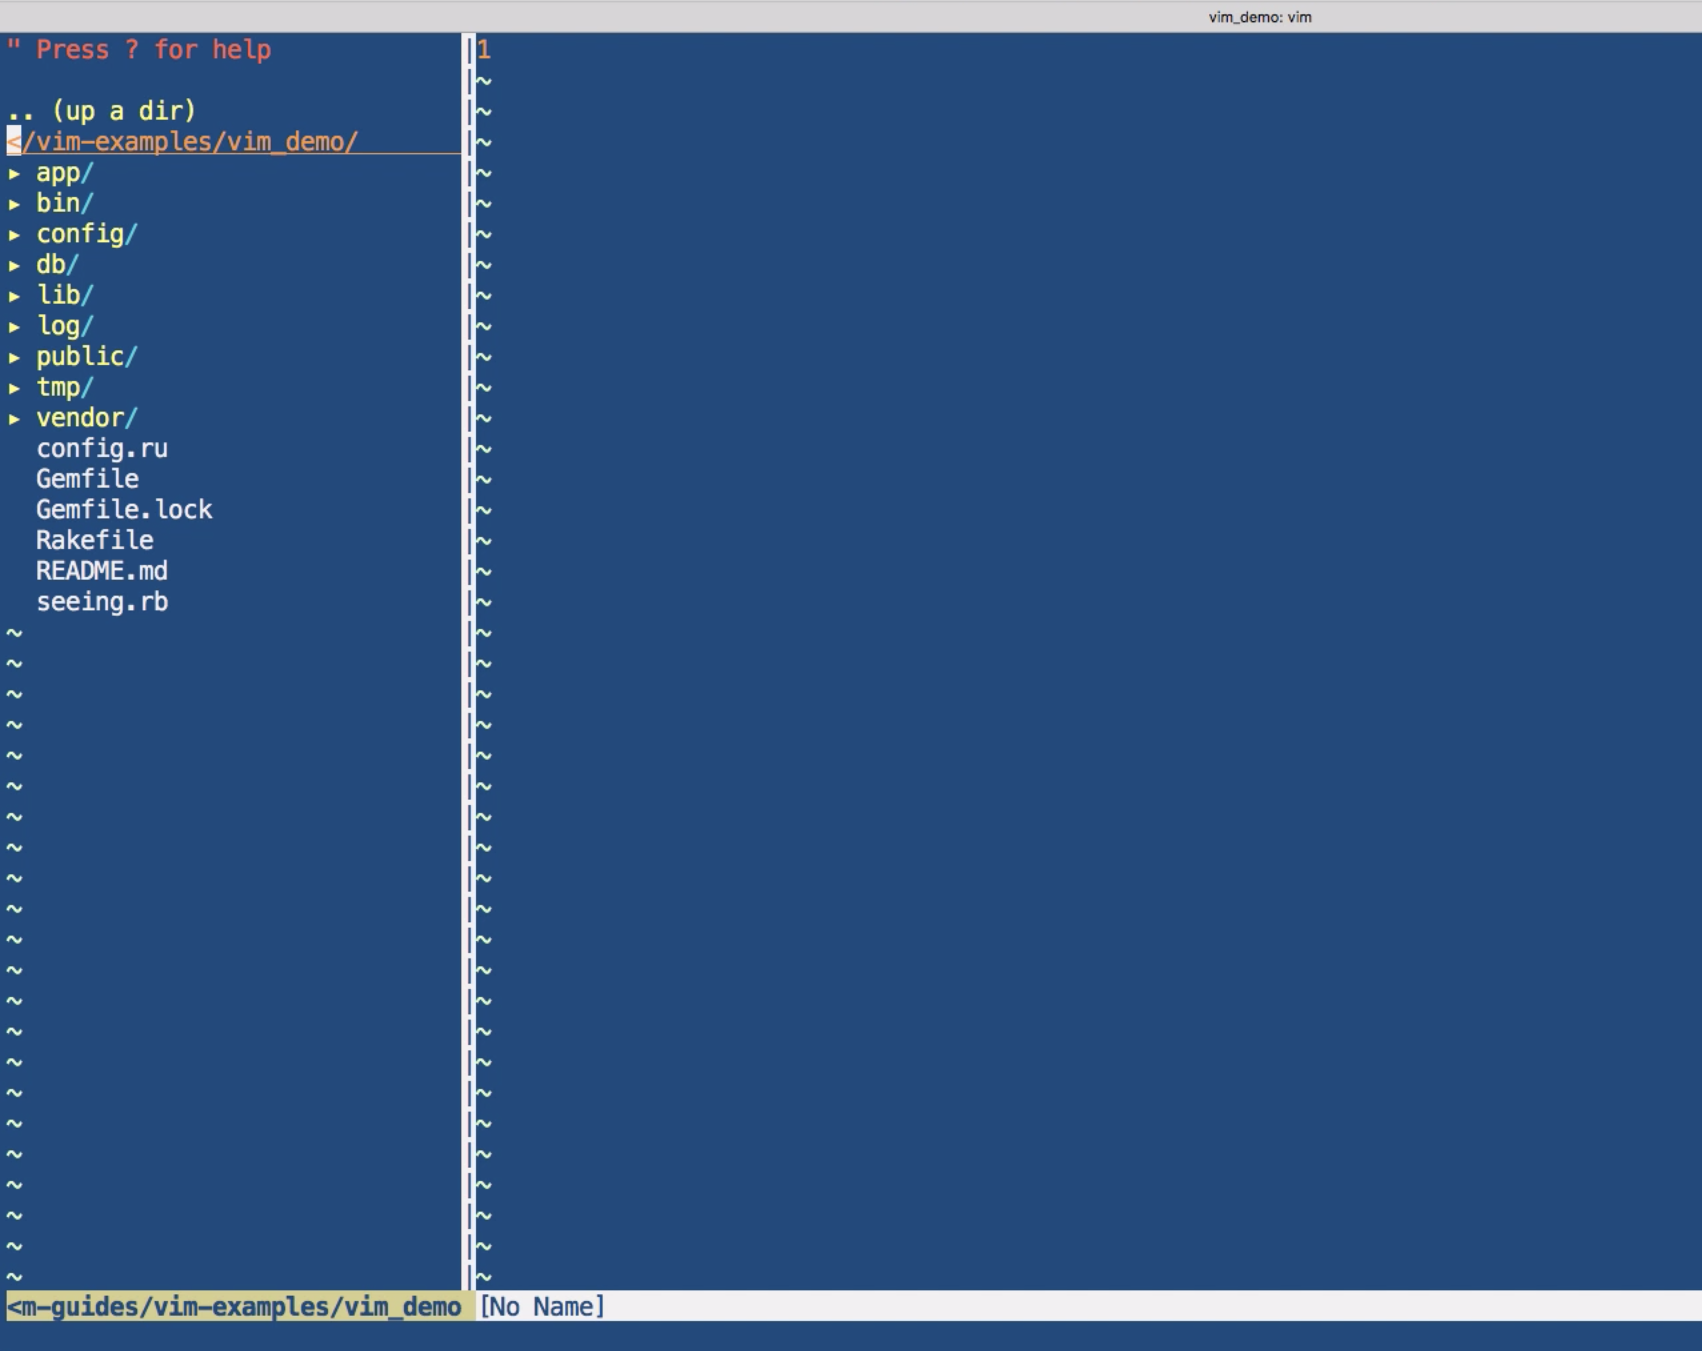
The cool thing about this is if you have mastered how to work with panes then you'll see that this is actually just another pane inside of VIM, nothing happens if I come and click on any of these, this is still not like Sublime, we're in VIM, everything happens at the keyboard.
So I can use all my same home commands such as, "J" to go down, "K" to go up, "L" to go to the right, even though there's really not a huge reason to do that. But usually I'm just at "J" and "K" for going up and down, and then to switch, I can say ctrl + ww, and that allows me to switch back and forth.
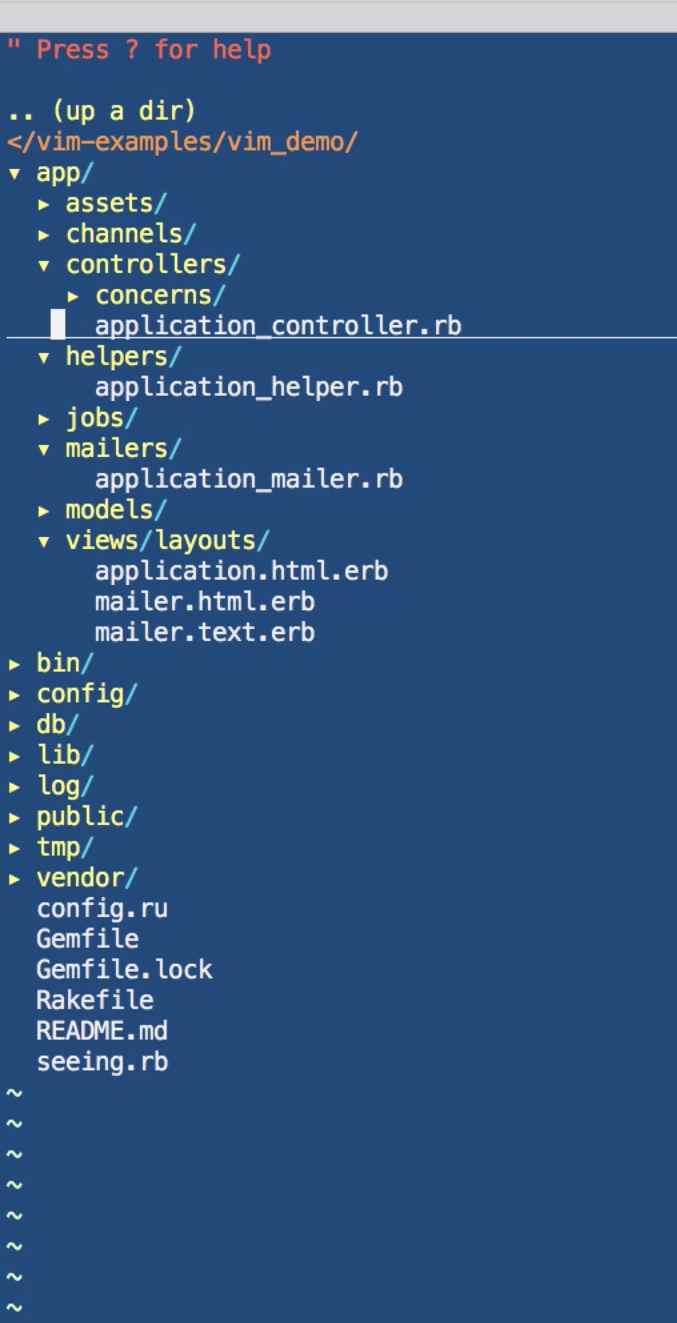
So now after you see this, if you go to one of the directories, and all you have to do it hit return, it opens up all of those, and return toggles it. So say I wanted to go to app and then controllers, I can do it just like that, and then using "J" and "K" to go up and down, I can come down to application controller click on return and it opens up that file for me. Hitting ctrl + ww I can navigate right back.
Go to views, come to application HTML, hit return and there you go, I have everything I need right here. This is kind of nice, I don't always use this, and there are many times were I simply like being able to have the file all by itself, because if you have worked on an application for long enough there's a lot of times where you don't really need to be able to see the file system on the left hand side, you know where the files are, its kind of just a waste of space.
There's many times where I'd rather have my schema file open here so I can have all of the different various names for the database, columns, and that kind of thing. But this can be nice, especially if I have taken over say, a legacy application and I want to know where all the files are on a visual tree kind of basis, then it's all right there for me.
Now because this is a just essentially another pane, if I switch back to this main pane and hit command + Q, it's going to quit and as you can see, I'm in just a regular pane.
And I can navigate and go pick out another file, and to close out of everything, I can do command + Q, command + Q, and I'm done. Now the reason why I like this kind of set up is watch what happens here if I want to just look at one file. If I say "VIM gemfile" and hit return, you can see that it only opens up that one file.
So there are many times where I don't want to have the tree on the left hand side and I want to make it optional. Now in those cases I can just specify the file name and I am good to go just like this. Now if, say that I opened up this file and I decide, oh you know what? I actually would like to have the tree on the left hand side.
You also have the ability to do that, simply type in the colon and type in "nerdtree" spelled out just like this, all caps for the nerd and the "T" part, and then "ree" in lowercase, hit return, and there is your tree right here and you can navigate to your heart's content.
So that is how you can integrate the Nerdtree plugin in VIM.