- Read Tutorial
- Watch Guide Video
In this guide, we're going to start going through and seeing how we can use search effectively in Vim, and before we go on to the actual commands, I want to update our vimrc file, remember that I told you you'd be updating it throughout the course, so it's ready to do that. I'm gonna select everything from lines 110 down to 115, hit copy, and now we can open up vim ~/.vimrc.
Moving down to the very bottom, let's hit paste, and now what this is going to do, let's walk through what these settings are gonna do, we're going to right here find the next match as we type in the search, and this is called ink search, then we're going to be able to highlight searches by default, we're going to ignore case, and then we're also gonna implement smartcase, what this is going to do is it's gonna make our searching just a little bit smarter.
If you search for an item that didn't type in the right case for it, then it might give you a little bit of strange behavior, so what I wanna do here is just make our searching a little bit smarter.
So I'm gonna quit out of this, now let's open up our example text. I added a little bit more text on the bottom here for Class and MyClass right here, so I created a class, and let's see a few different ways that we can search, we're gonna move on to the class in a little bit, but first I wanna show you how you can search on a single line.
So right here we're on line 41, and let's say that I want to jump to right here where it says fourth, you can actually jump to specific spots on a line of text by typing the letter f in, followed by whatever you wanna skip ahead to, so if I type in f, and then f, it takes me to fourth.

Now, f is not a special word, in other words it didn't have to be fourth, so I could type in f a and it takes me to the first a. Or I could type in f w and it takes me to that first w, so it's just finding on a specific line, that's how you can do that.
Now, that's helpful, that's more kind of just a quick navigation shortcut. Usually what you wanna do when you're searching is search through the entire file, so the way that you do that is you give the command slash, and then you pass in whatever pattern you wanna do, so say I wanna go up to that final line, I wanna find the final word, then I can type in final, and as you can see it's highlighted it right there for me on line 26, and the reason why it highlighted that there is because we added that in to our vimrc setting file.

Now, one thing you may notice is, if I navigate away from this, the highlight still stays, and so that would be kind of annoying.

What you need to do to fix this is type in the command noh which says, essentially, no highlights, and it gets rid of that for us.
Now, let's go in and let's go to the beginning of the file, and we have the word but here a few times. Let's start searching for that, cause I wanna show you how you can not only find one single word but also find multiple words and navigate to each one of them. So, if I do the slash command, I can type in the word but and it takes me, and look at that, it highlights all of the buts everywhere in the file.
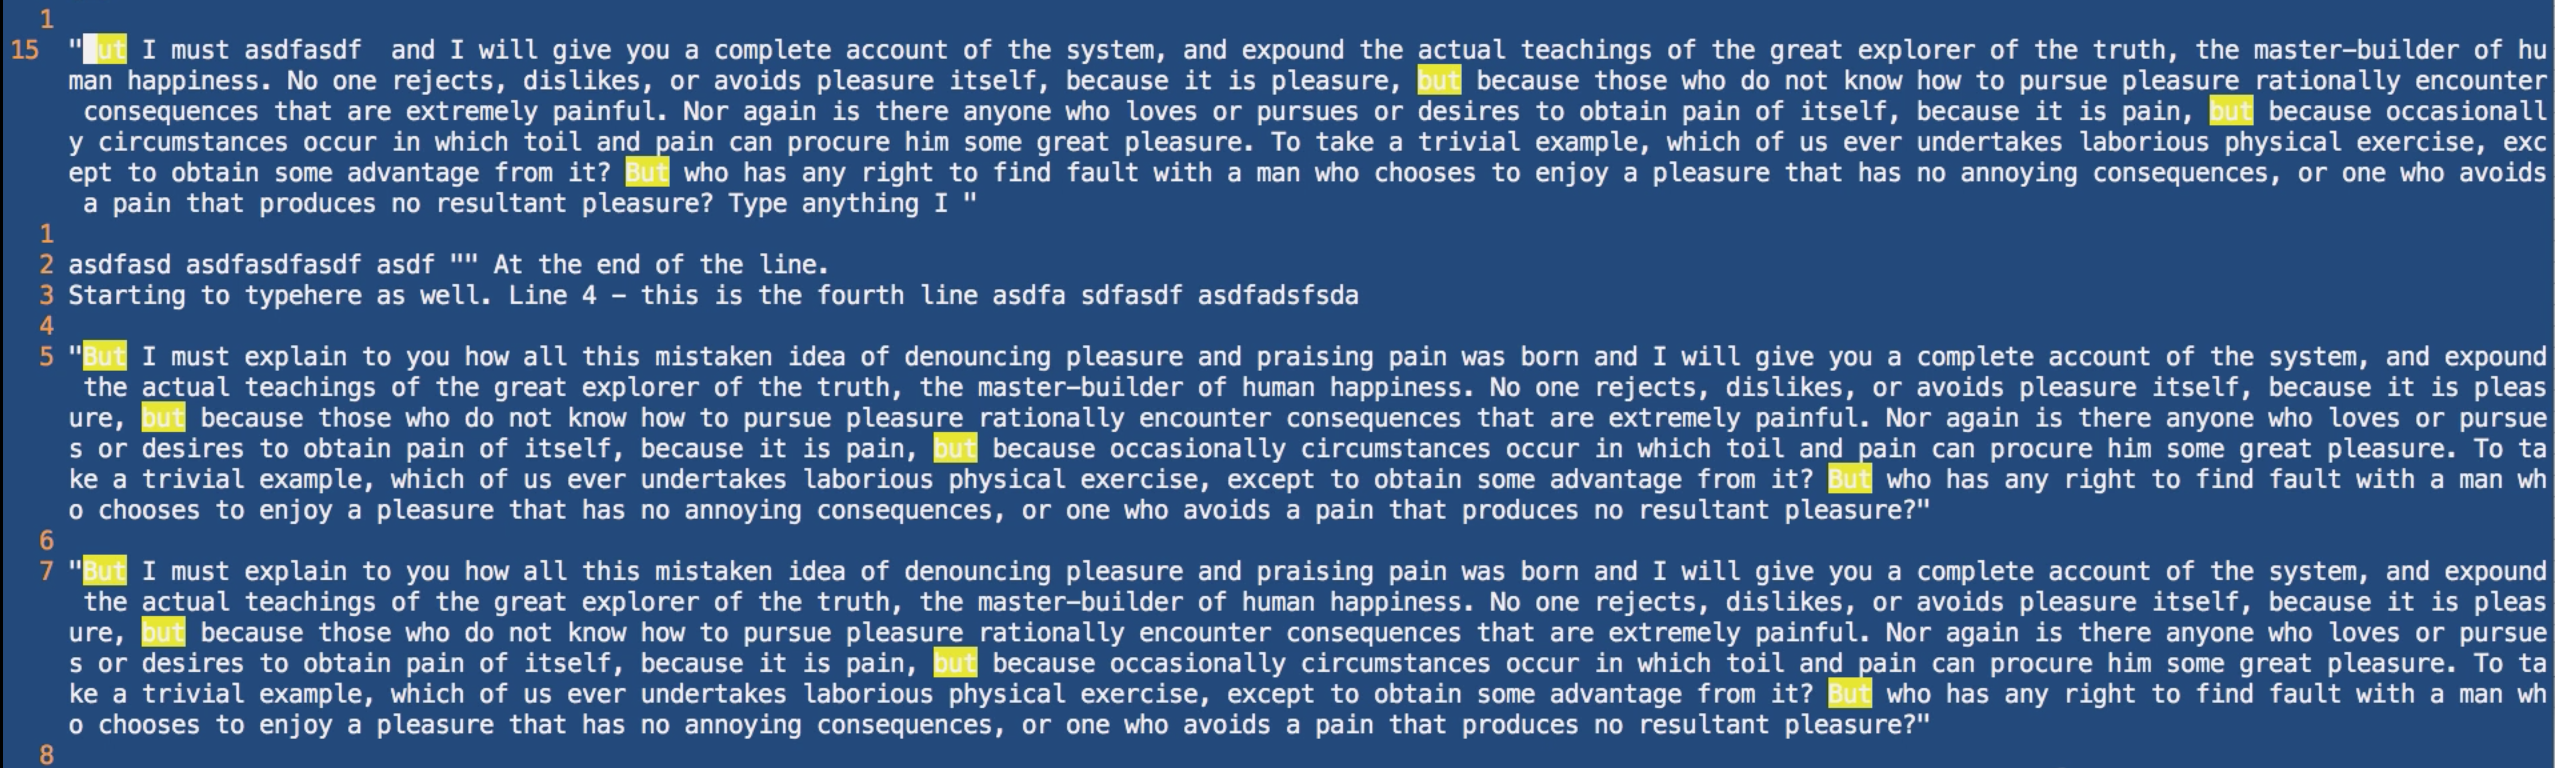
Now, it'd be annoying if I had to go and navigate to each one of those manually, so what you can do is type in the n key, and right there, notice how, maybe a little bit hard for you to see on the screen, but it's actually taking me to each one of those, and you can see on the left-hand side that the line numbers are changing. So what this is doing is it's taking me when I'm hitting n to the next item. And all the way down to the very very bottom, and then it starts cycling all the way back up at the top, so lemme clear the search by typing noh and all of those are gone, so that's how you can search, and that is also how you can navigate to different items.
Now let me go with, lemme search for mistaken. Just right here, and it's highlighted all of those mistakens, now if I type n, it takes me to each one of 'em. Now, say that you have something where you have 100 different lines or 100 different matches, you wouldn't wanna have to cycle through them just like I'm doing right here, what you can do is in addition to using the lowercase n to navigate to the next search item, you can use the uppercase N, and that will navigate you backwards. So lowercase n navigates you front, uppercase N navigates you backwards, and that's how you can search and then find items and how we can take advantage of things like highlighting inside of Vim.
In the next guide we're gonna go through how we can perform the very important task which is to find and replace items inside of Vim.