- Read Tutorial
- Watch Guide Video
- Complete the Exercise
I think that it's worth it to go through an entire guide just to understand CSS because I've seen this particular feature of CSS get very confusing, especially as developers get into more advanced programs.
If you understand it now from the beginning, it'll hopefully help save you from a lot of headaches later on.
Let's talk about what it means by cascading. I'm going to take a very base-case scenario, and just in review, if you open up the web browser for this site right now and hit refresh, you can see that we have our code here.

Now if you come back into the text editor, notice how the text was red. If you want to override that, watch what happens here when I add different styles in below.
styles.css
h1 {
    color: red;
    text-decoration: underline;
}

h1 {
    color: goldenrod;
}
If you come back to the website and hit refresh, you can see that the color is now goldenrod.

What this means from a cascading perspective is it is perfectly fine, and it's also a very normal process to have styles overriding other ones. Now it doesn't make sense in this exact use case, 'cause if you wanted to change the style by overriding it, then you wouldn't usually put this directly in the same file.
Let's test out something a little bit more advanced. If I go into our file directory, and I create, say, styles2.css, let's go and grab this code from here, and just paste this in Styles2.
styles2.css
h1 {
    color: goldenrod;
}
Next, inside of our index.html file, remember how I told you that you could import multiple files? Well, let's come and do that.

Hit save here and then come back in the browser,
You can see this works exactly the same way.
One way that you could imagine that the workflow for importing style sheets is, HTML loads the document, and when it gets to the <link> tags, it pulls in the styles.
It'll pull in the first styles.css and run everything in it, then right afterward it gets to this other <link> and it says, "Oh, okay. We need to pull in this other style sheet." And then it pulls that in and runs it.
And because we are having the exact same selector, the second one is running last and just overriding the first one.
Now it's not overriding the file at all. It is simply overriding the selector, which is important to also keep in mind.
If we were to come down on the bottom of index.html, and we're going to use what's called a paragraph tag, or <p> </p>. We'll get into this later, but it's pretty self-explanatory. It just gives you the ability to have paragraph content.
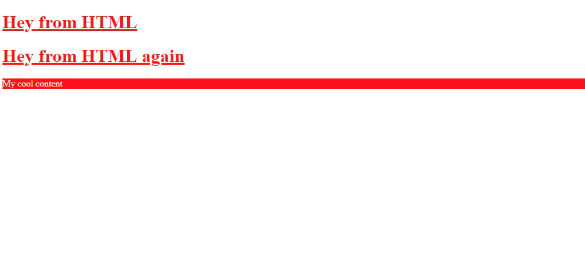
I'll say <p>My cool content</p> here, and hit save, and now I'll go into our main styles file and style this.
styles.css
h1 {
    color: red;
    text-decoration: underline;
}

p {
    background-color: red;
    color: white
}
Now let's check out the browser.

You can see that it says "My Cool Content", and it has a background of red and the color of white, so even though the heading tag did get overridden, the paragraph tag styles still are working.
This means that if you import multiple files, just like we did here, only the overrides are going to take the place of the preexisting one, so, in other words, this Style 2 is only going to override the H1 tag. It's not like it wipes away all of the styles from those other files.
Now we can get even more specific here. I think this is going to help because this is where a lot of bugs come in later on if you're not used to it.
Let's go, and let's un-comment the styles in index.html, and we're going to change this color back to red and hit save.

We have added our embedded styles back in and if I hit refresh, you can see that we are back to red again. This means, that our embedded styles are going to override the selectors in both the first call and the second one.
Now the order here is very important. If I cut the embedded styles out, and I go, and I put them above those imports and come back, you can see that we're back to that goldenrod color.
Now, this may seem a little confusing if you've never done it before, however, you can think of this as just being an order of operation. As soon as the index.html file calls this style tag, it is going to set this as a rule. Then, if it gets another rule, then it's going to override it. Then if it gets another one for the same element, it will override it. And it will do that for every element on the page.
Now we can get even more specific. Let's comment out our tags and use our in-line styles instead. Let's change this one to blue. If I hit refresh, you can see that it's blue.
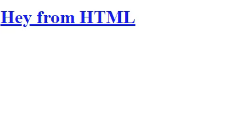
This is the way your style rules are going to work with cascading style sheets. That's the whole reason for the name. Now you also have the ability to see this process inside of the inspector.
Now I'm going to show you these rules. You notice how it actually has our full history of that cascade process.

So starting at the very bottom, this is the base HTML set of rules. So when you use an H1 tag in HTML, it is going to have these rules associated with it. It's going to have a default font size, it is going to have all of these other things.
You don't have to worry about them right now. You're going to learn how all of these work as you go through the material.
Then, you have an H1 rule, and you can see that this was declared inside of the index file. So if you click on that, it even shows you exactly where this was defined. This was our embedded style. Now going back to elements, you can see the next one was defined inside of our styles.css file.
This is the very first external style sheet that we created. And you can see when it shows that's marked out, that means that that rule has been overridden.
Then from there, moving up, we go to styles2.css, which you can see right here with a color of goldenrod. And that also has been overridden. And lastly, we have the element style. This is the in-line style that was added directly here of color blue. So, this is very helpful.
I can tell you, this may seem a little trivial or contrived right now, but I promise you, when you start building out big applications and big websites, you're going to run into a number of issues where you think that you have applied a certain style to an element, and it's not going to be applied.
It's going to be very frustrating if you don't know how this process works. So, one of the very first things I do when I apply a style, and it's not reflected on the page, I will open up the inspector. And then many times, what I see is that it has a little slash through it where it has this strikethrough effect.
What that tells me is that there is another style that is overriding the one that I was trying to do. And then I know what to do in order to go fix it, which is to go change up the order and to be able to have something that gives the style I was looking for.
In a final review, what we walked through in this guide is understanding the cascading nature of CSS and how the order in which you call the styles is very important, how it gives you the ability to override elements, and how you can see this entire process inside of the browser's development tools.